How to use Reconcio
A complete walkthrough from uploading your first files to reading the results and exporting the diff.
From the dashboard, click New reconciliation. You will see an upload screen with two drop zones — File A and File B.
File A is typically your primary source — an ERP export, general ledger, or accounts payable report. File B is the file you reconcile against — a bank statement, counterparty report, or subsidiary data.
The files do not need to have the same column names, the same number of columns, or the same number of rows.
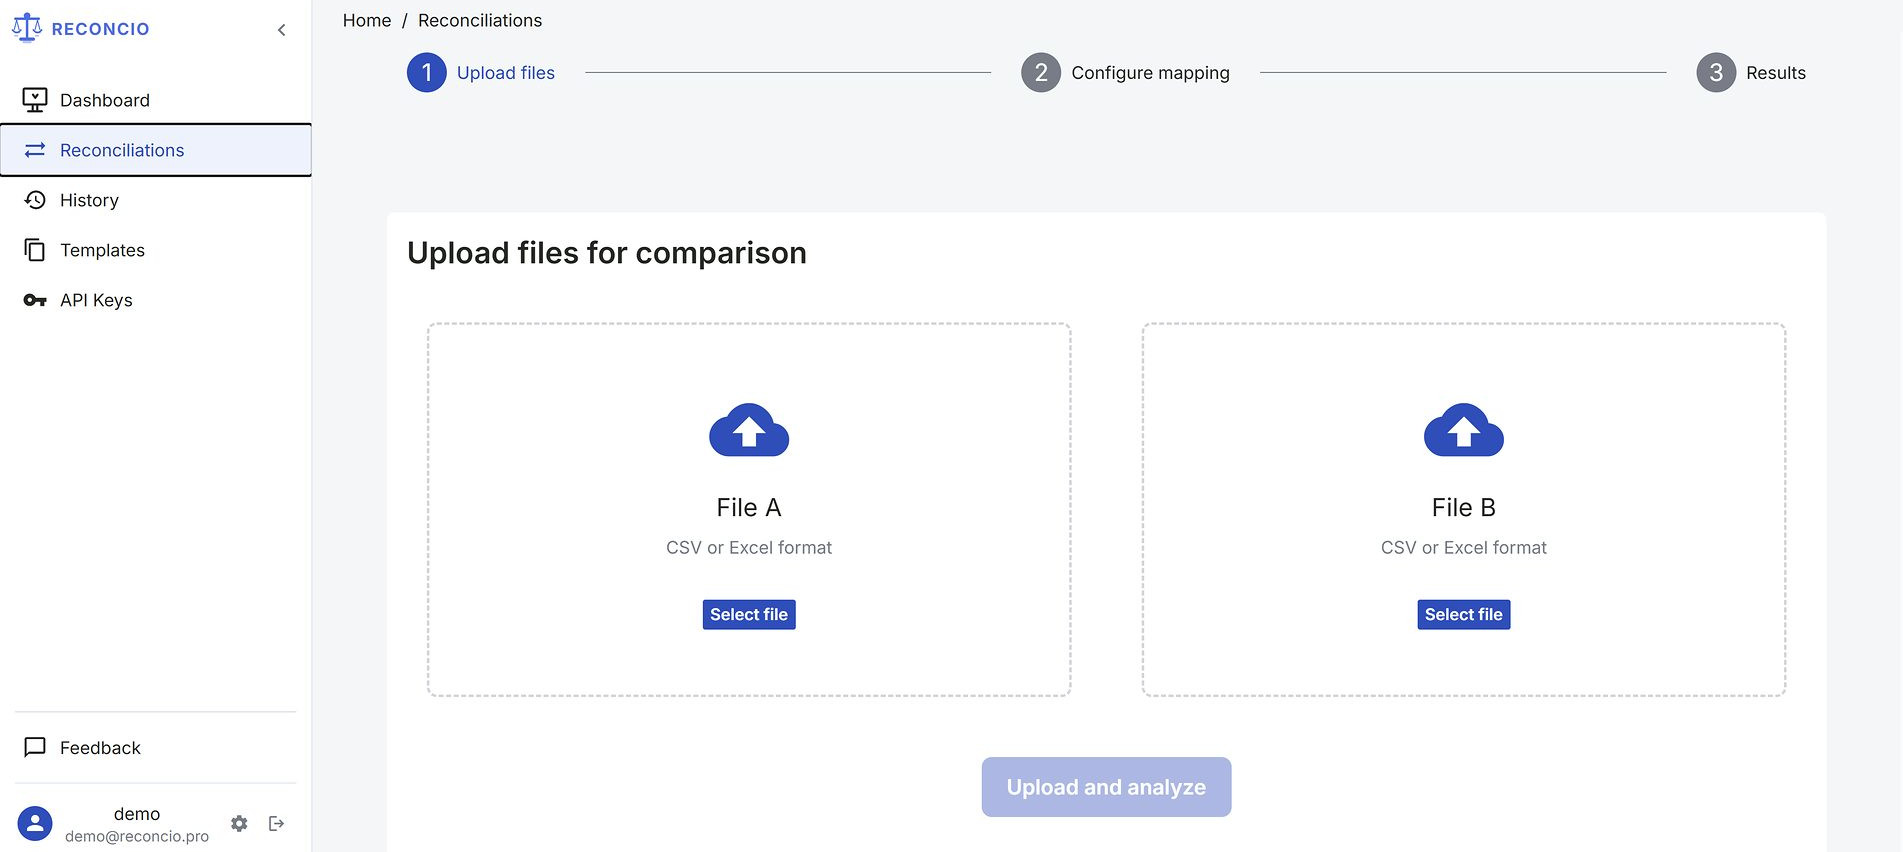
Upload screen — two drop zones
After upload, Reconcio analyses both files and suggests how columns correspond. The suggestion is based on column names, data types, and value patterns.
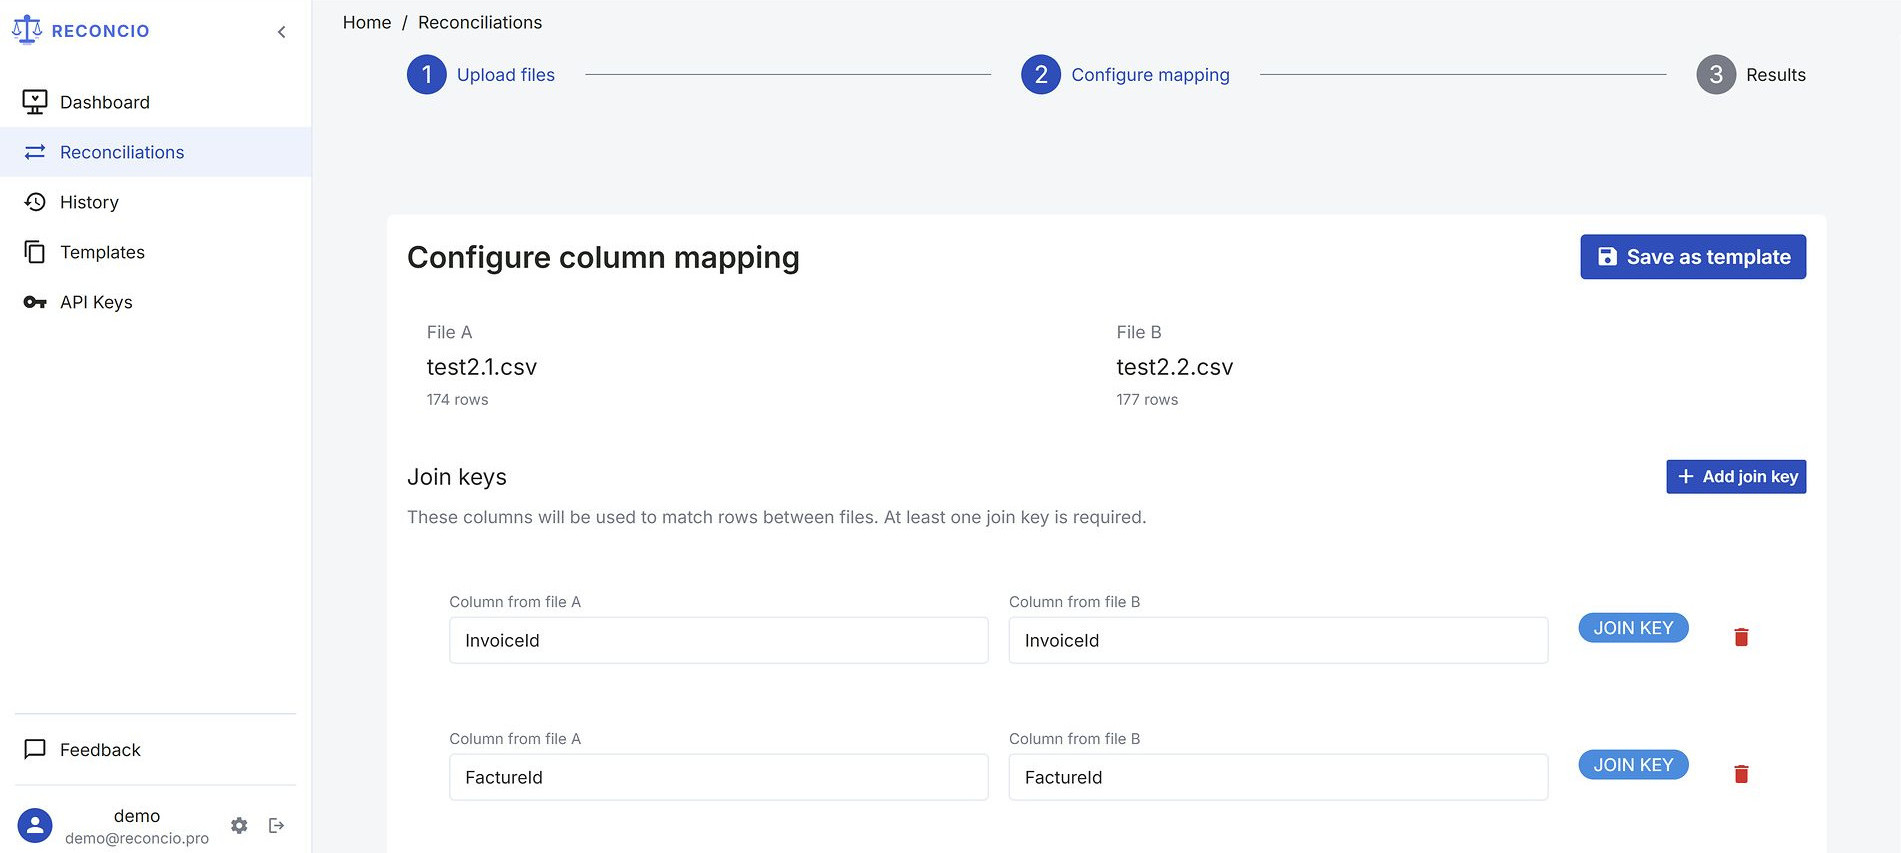
Column mapping — join keys configuration
Join keys
A join key is the column (or combination of columns) that uniquely identifies a record. Reconcio uses join keys to match rows between files. At least one join key is required.
InvoiceId +
CompanyCode.
Comparison conditions
For non-join-key columns, choose how values are compared:
Once all columns are configured, click Run reconciliation. The job runs on the server — you can navigate away; the status updates automatically.
Processing time depends on file size. A 10,000-row file typically completes in under 30 seconds. Files with 100,000+ rows may take 1–3 minutes.
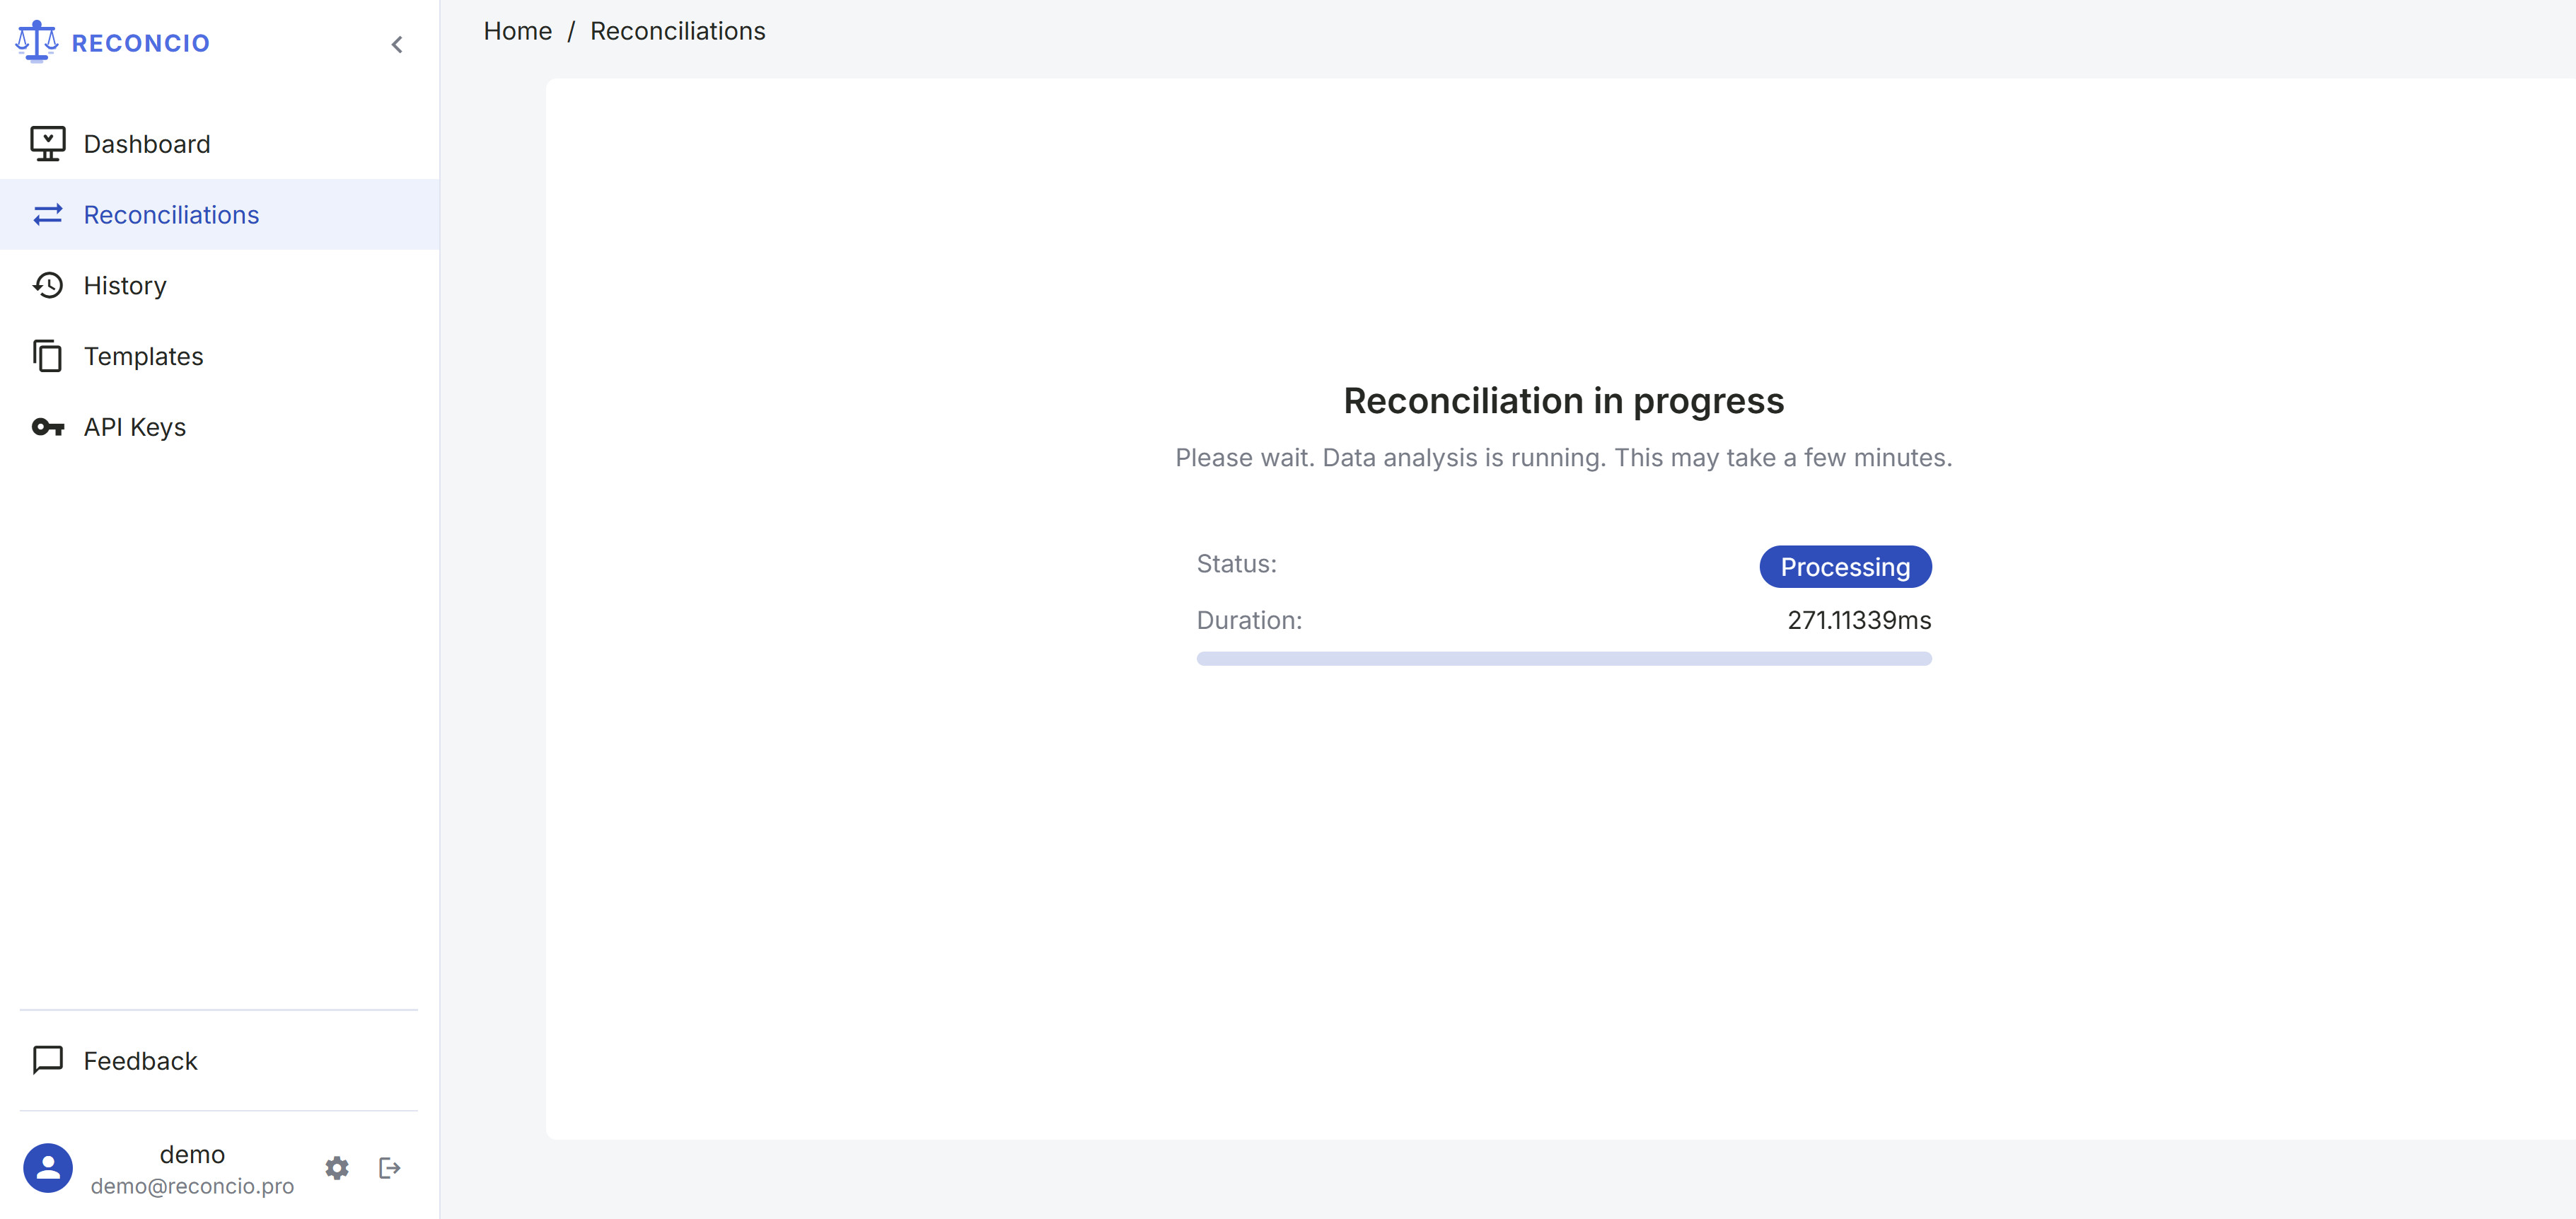
Processing screen — reconciliation in progress
When reconciliation completes, you are taken to the results screen showing the convergence score, four row counters, and a downloadable diff file.
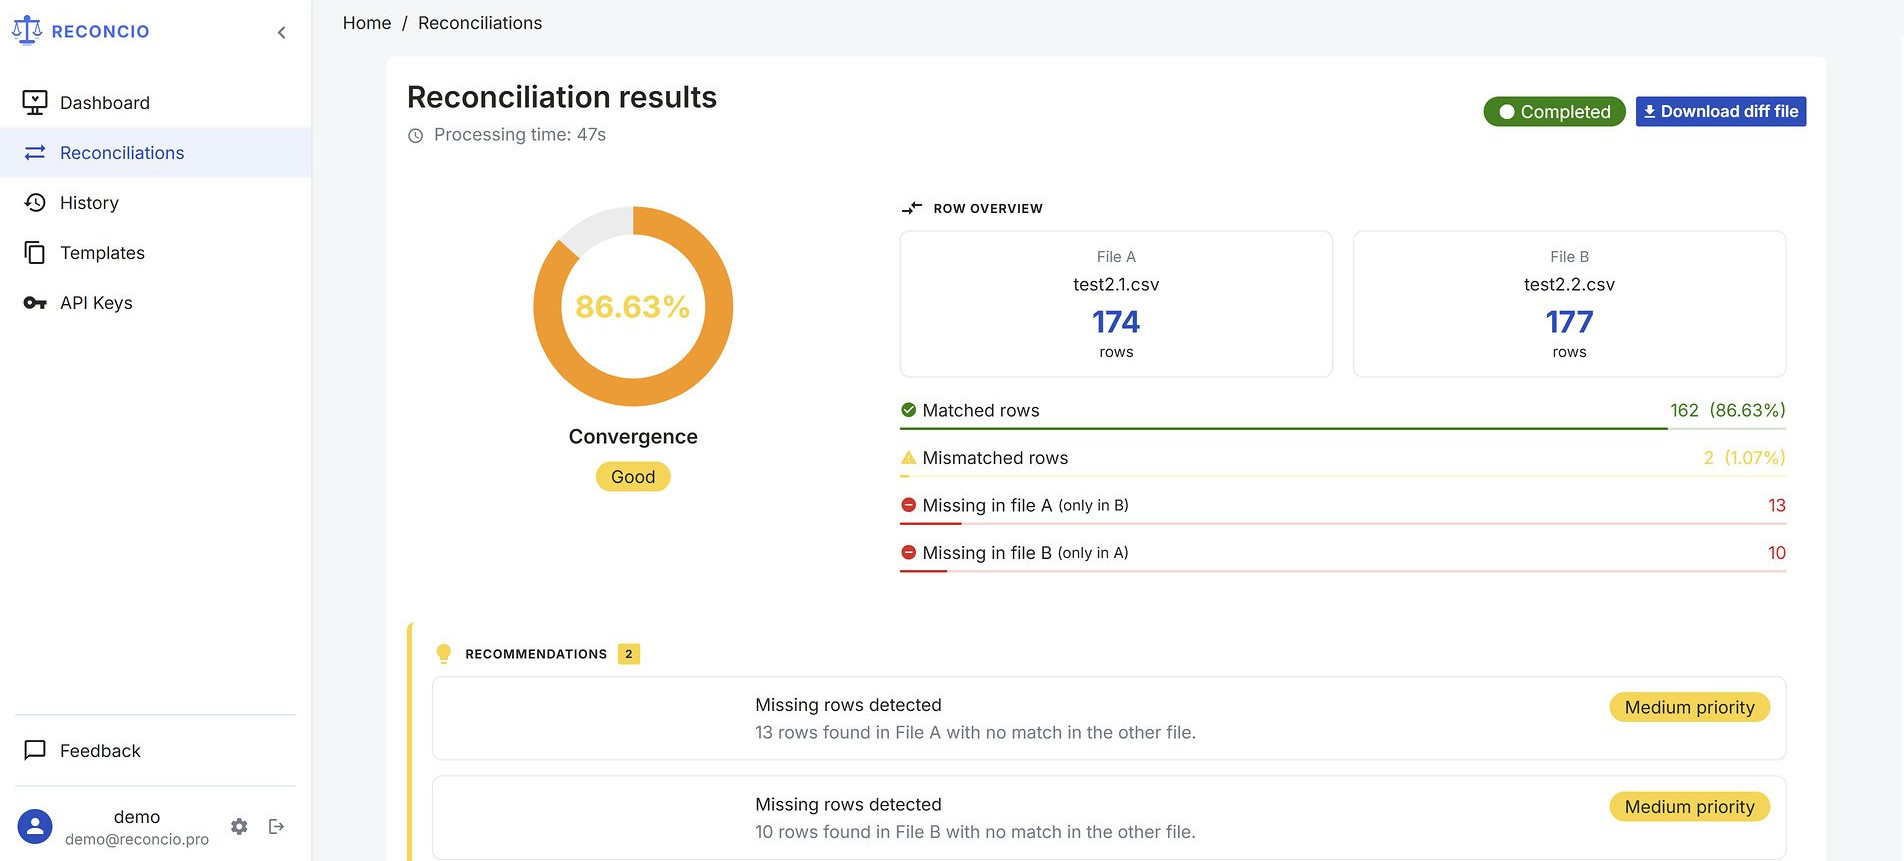
Results screen — convergence score and row counters
For a full explanation of every metric and the diff file format, see the Results & Diff File guide →
If you run the same reconciliation regularly — same supplier, same ERP export format — save the column mapping as a template. Next time, load the template instead of configuring from scratch.
To save: after configuring column mapping, click Save as template and give it a name. To apply: on the mapping screen of a new reconciliation, click Apply template and select from the list.
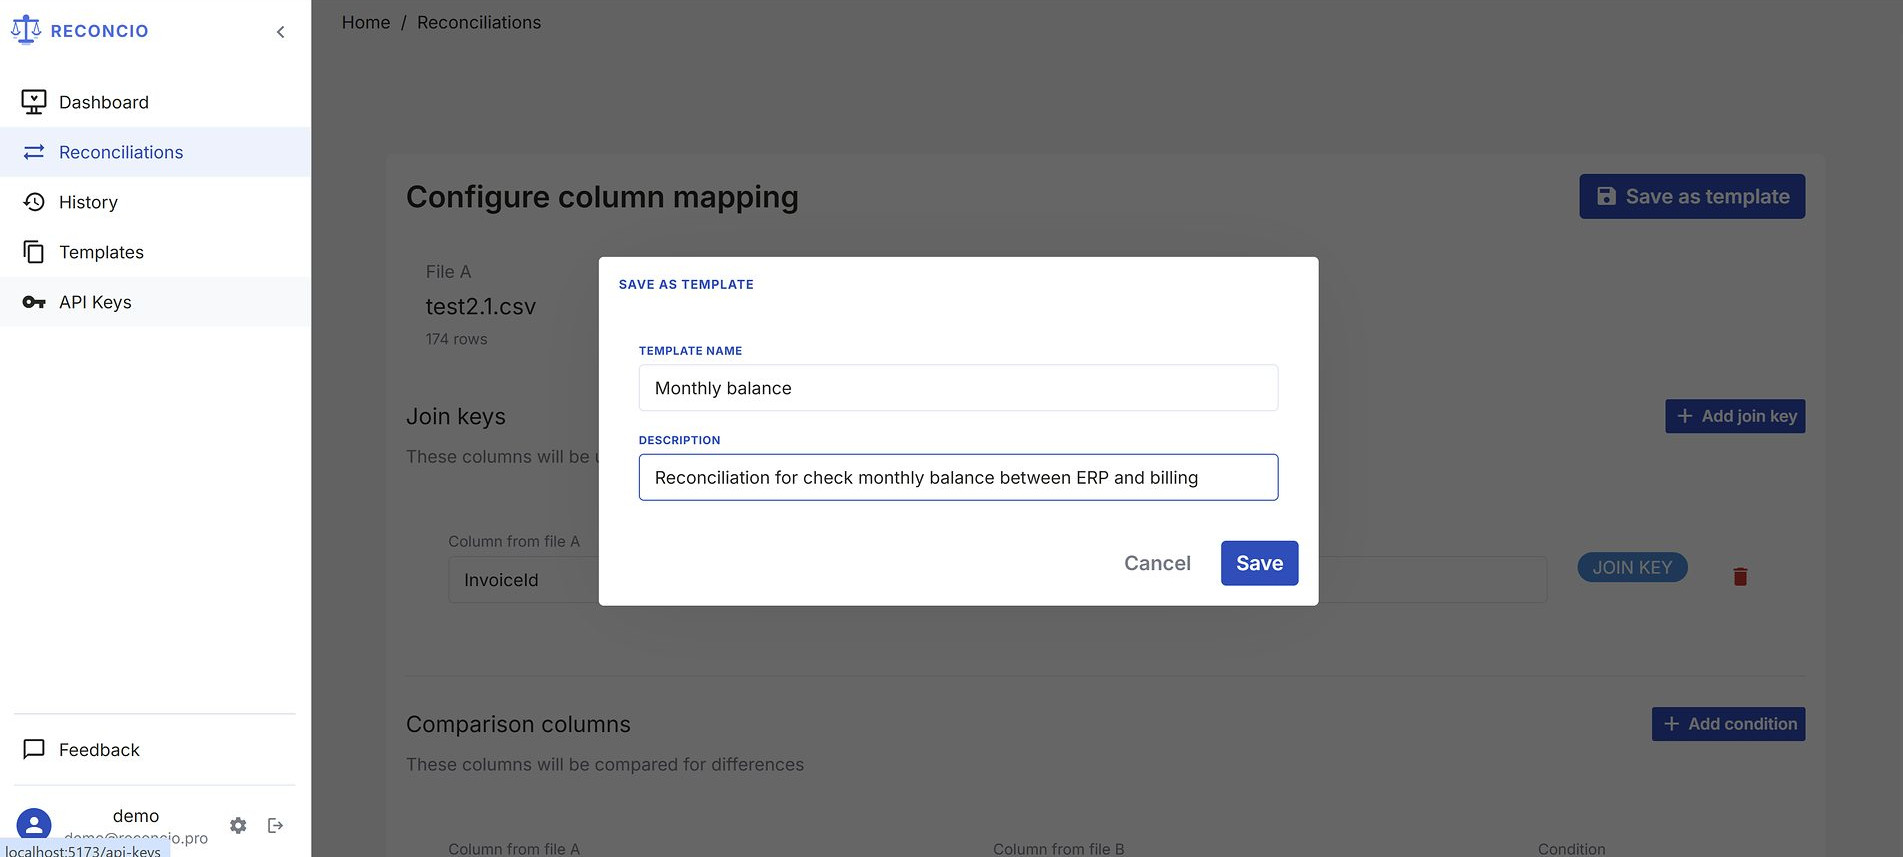
Templates list — saved mapping rules
The History section in the left sidebar shows all your past reconciliations in chronological order. Each entry shows the reconciliation ID, status, file names, row counts, and creation date.
You can filter the list by status (completed, failed, processing) and by date range. Use the ID search to quickly find a specific reconciliation — useful when an auditor asks about a particular run.
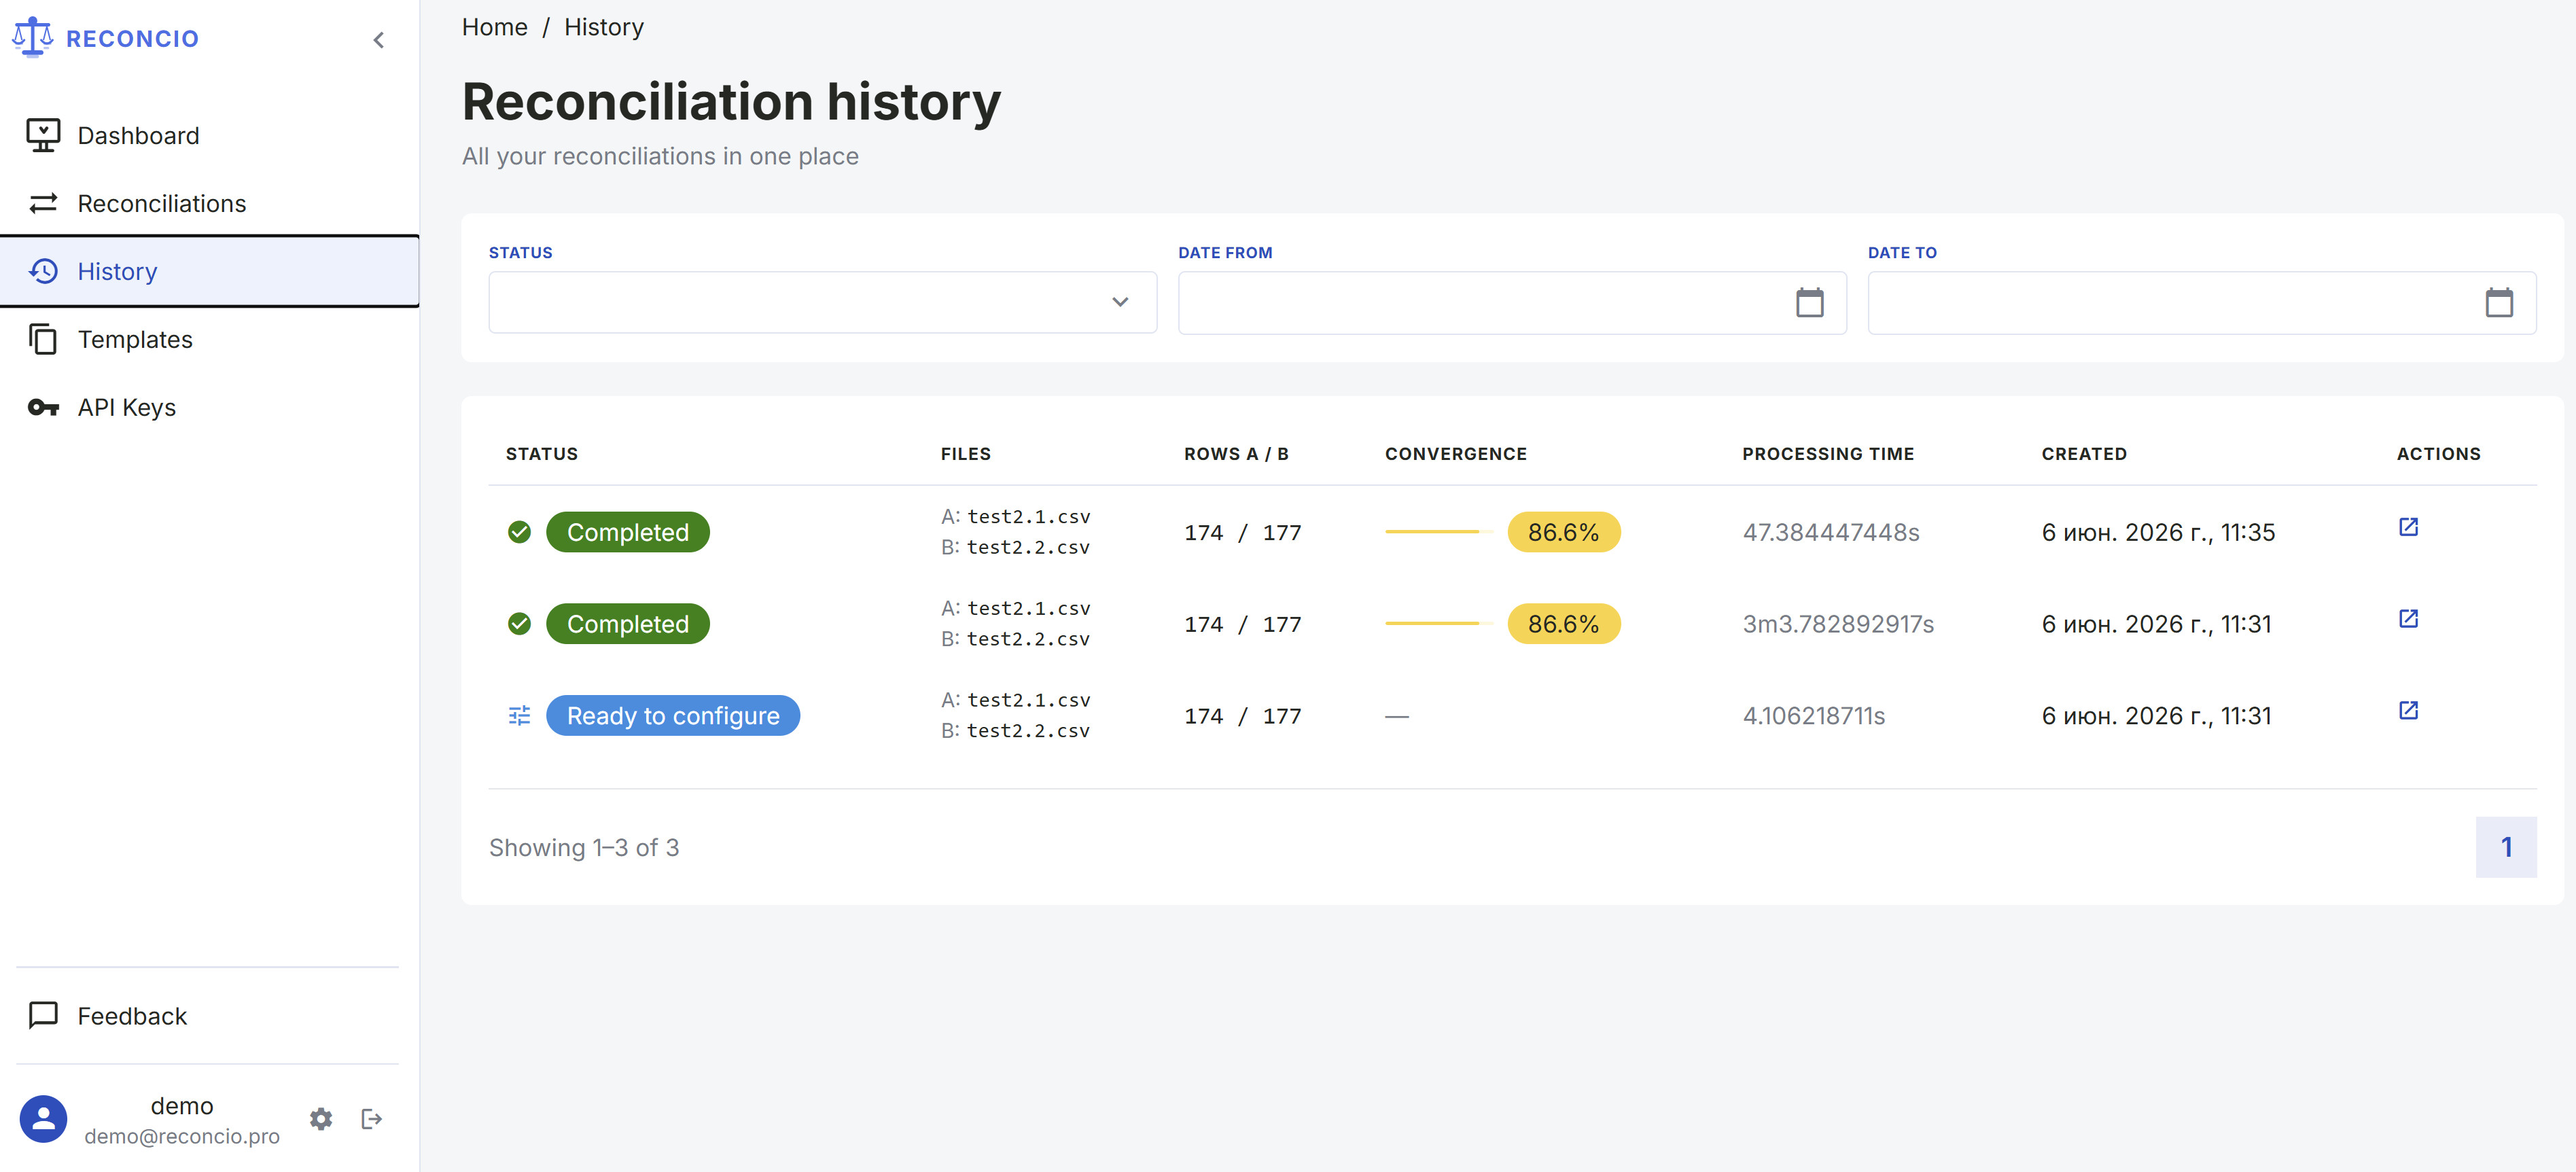
History screen — past reconciliations with filters
API keys are available on Pro and Enterprise plans. Go to Settings → API Keys to create a key for integrating Reconcio into your own systems.
Each key has a name, optional rate limits (requests per minute / per day), and an
optional expiry date. Pass the key in the Authorization header:
Authorization: Bearer <your-api-key>
For the full API reference, see the API Reference →
Appearance
In Settings → Appearance you can switch the interface language (English, Russian, Chinese) and toggle between light and dark themes.
Change password
In Settings → Security, enter your current password and then the new password twice. The password strength indicator shows whether your new password meets requirements (must contain uppercase, lowercase, digits, and special characters).
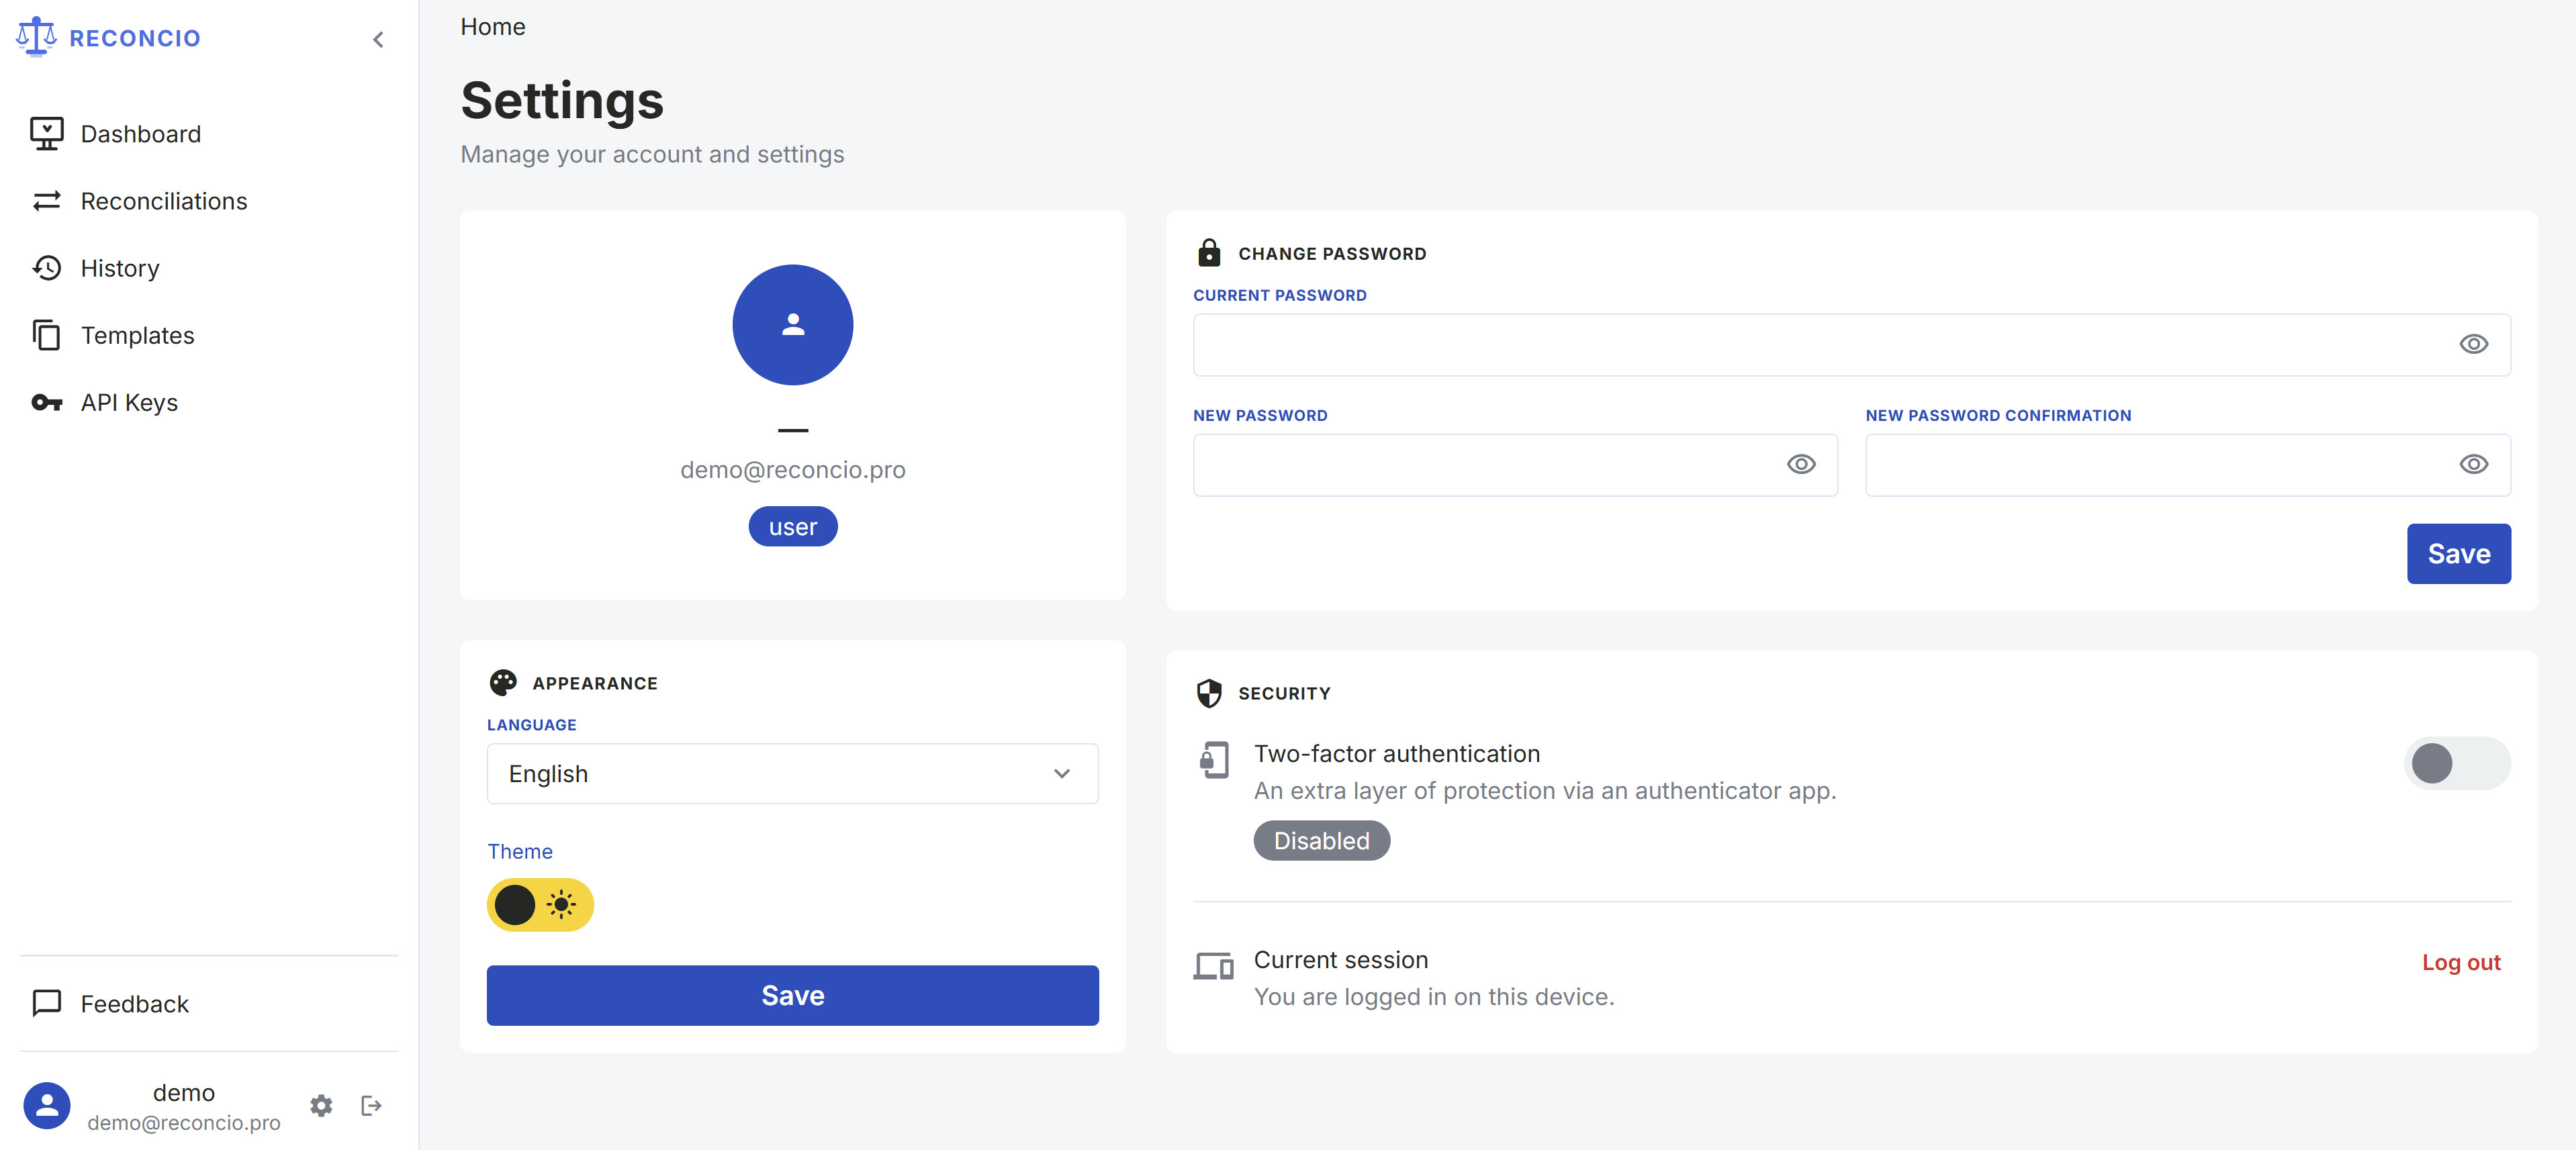
Settings — change password with strength indicator
Two-Factor Authentication (2FA)
2FA adds an extra layer of security via a TOTP authenticator app (Google Authenticator, Authy, or any compatible app).
To enable: click Enable 2FA in Settings → Security. A QR code will appear — scan it with your authenticator app, then enter the 6-digit code to confirm. From that point, every login will require both your password and a fresh 6-digit code.
To disable: click Disable 2FA and confirm with a valid 6-digit code from your app.
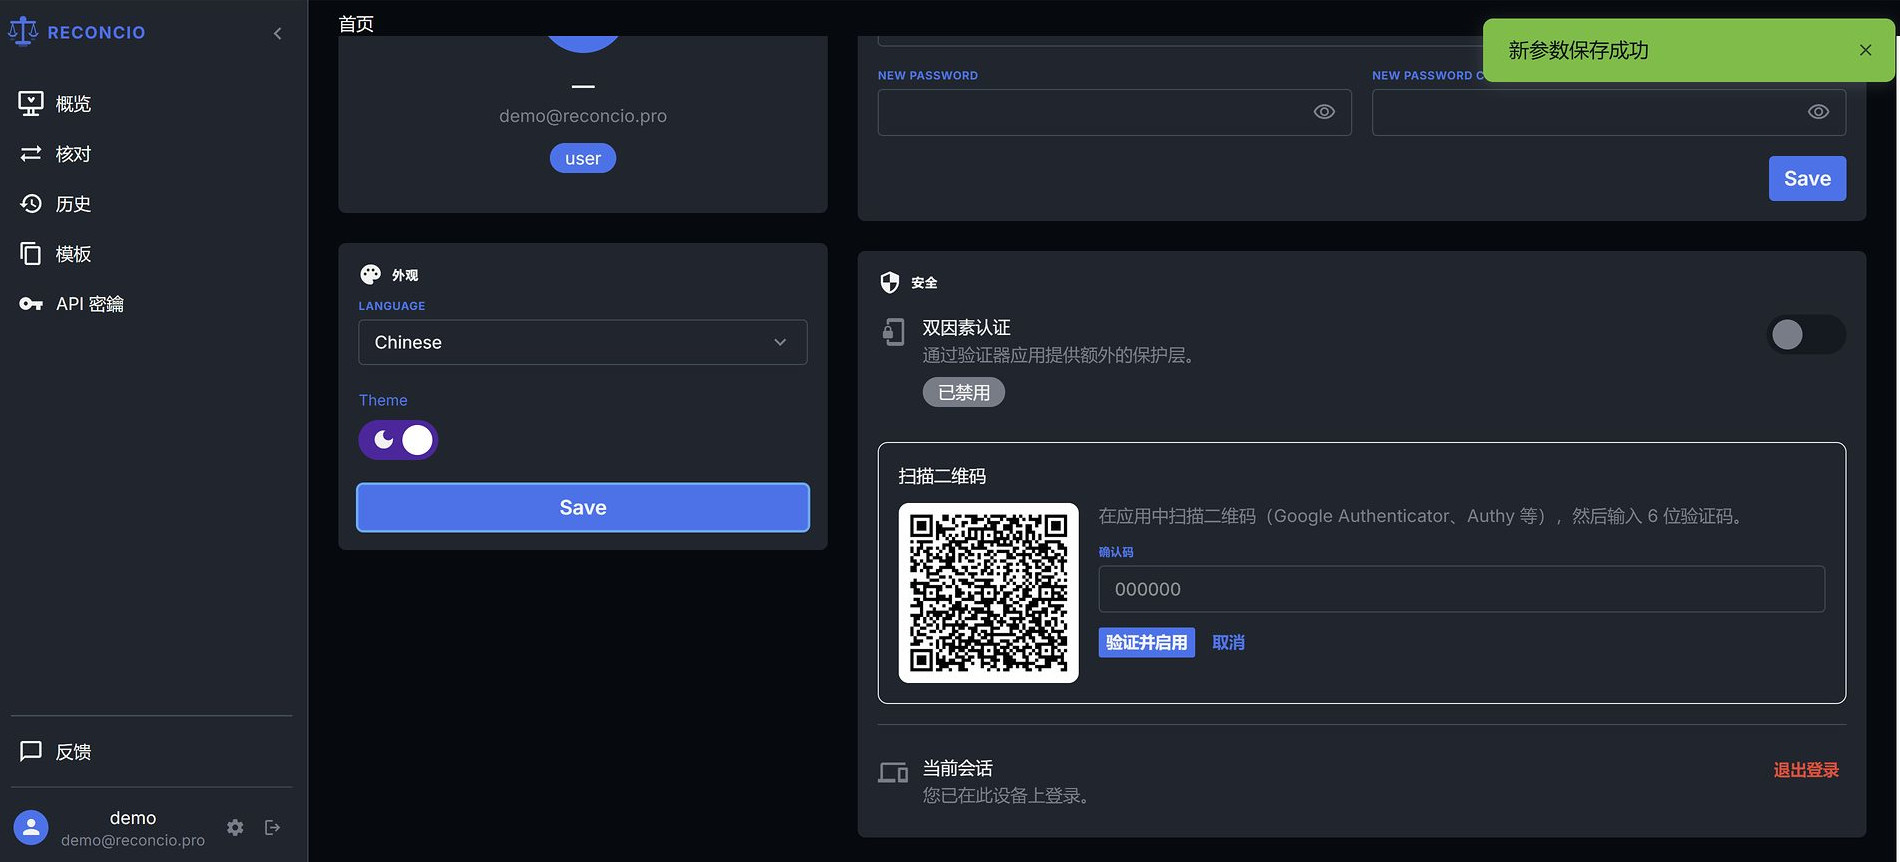
Settings — 2FA setup with QR code
Supported file formats
Reconcio currently supports the following formats. The first row of each file is treated as the header row. Blank rows are skipped. Leading and trailing whitespace in values is trimmed automatically.
| Format | Extension | Notes |
|---|---|---|
| CSV | .csv |
UTF-8 encoding, comma or semicolon delimiter auto-detected |
| Excel | .xlsx |
First sheet is used. Formulas are evaluated to their computed values. |
.xls format is not supported. If you have an
.xls file, open it in Excel or LibreOffice and save as .xlsx or export as
.csv before uploading.
File size limits
| Plan | Max file size | Max rows (approx.) |
|---|---|---|
| Base (free) | 10 MB | ~50,000 |
| Pro | 100 MB | ~500,000 |
| Enterprise | Unlimited | Unlimited |